Archive | July, 2011

Last Reminder to Re-Subscribe to the New Site!

30 Jul

Happy Saturday, All!

This is just a final reminder that I am taking the final steps to switch over completely to my new site lifetasteslikefood.com tomorrow night. This means that if you are currently subscribed, your subscription will NOT continue UNLESS you go to the new site and RE-subscribe via email.

If you are subscribed via Google Reader (or something of the equivalent), you shouldn’t have to change the URL, although it wouldn’t hurt to change it to lifetasteslikefood.com just in case.

Thank you so much, Everyone! I hope you are all enjoying the weekend and wonderful weather :)

New post to come on Monday–get ready!

Life Tastes Like Food is Moving!

28 Jul

Sorry I’ve been kind of absent lately, but I am very excited to announce that Life Tastes Like Food is finally taking the steps to become a self-hosted site (and getting a visual makeover)!! But as much new freedom and versatility this change allows, it does come with some consequences.

I’m disappointed to say that NONE of my subscriptions will transfer over. So if you have subscribed to this blog via WordPress.com or via email, PLEASE, PLEASE hop on over to the new link lifetasteslikefood.com and re-subscribe through the new email link (FeedBurner).

This will only take a second. In a couple of days, this entire blog will switch over to the new layout entirely, and I want you guys to keep getting my post updates!

Plus, if you subscribe, you will be one step ahead for the giveaway coming up! (Does that help maybe swayyy you??? I hope so!)

Thanks for your patience, Everyone. Let’s hope this transfer goes smoothly!!

-Steph

Here is the link again to re-subscribe and continue getting updates: lifetasteslikefood.com (The subscription box is on the right-hand side.) Thanks!!! :)


Sesame Crusted Seared Ahi Tuna

20 Jul

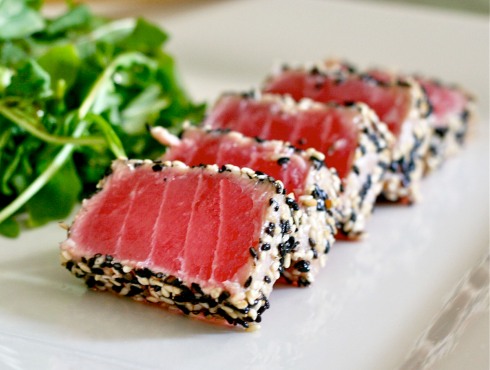
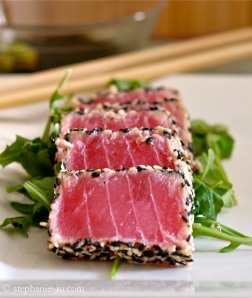
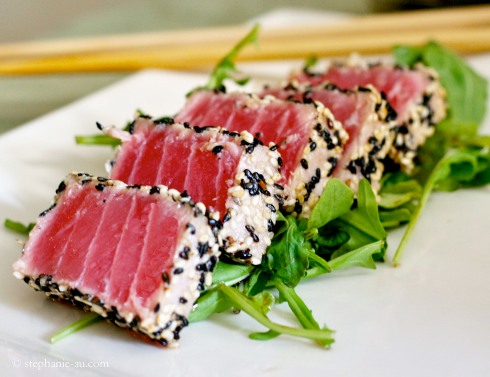
I have an unconditional love for seafood. Unconditional. It’s just so tasty, and I can’t explain why. This sesame crusted tuna is unbelievable easy and quick to make. Searing it adheres the sesame seeds on so nicely and seals in the freshness of the fish.

The other day, I didn’t really feel like trying something at a picnic, and a friend  called me out reminded me that I had just written about giving things/food second chances. And he was absolutely right!

Today, I am simply grateful for that reminder.

And in honor of that, I decided to make a version of a dish that I absolutely hated when I first tried it and now enjoy: sashimi. Now I loveeee raw fish! And I spend way too much money on it! Recently, though, I visited the seafood counter at Nugget Market inquiring about their oysters and tuna. The very nice man behind the counter said that their fresh ahi tuna was not on sale (at $22 a pound, I most definitely passed) but they had just discounted sushi-grade ahi tuna steaks that were flash frozen in the freezer isle. Boo-yah!

My awesome find at Nugget Market

 I bought my tuna steak, let it defrost overnight in the fridge, and reveled in my home-cooked seared ahi tuna later that same night. Although sushi and sashimi have won my heart over and over again, I cannot help but think every time I eat it what my life would be like if I had never given it a second chance. Deep, I know, but seriously! What if we judged everything by the cover and never opened the book? Well, there’s just absolutely no adventure or fun in that. Let’s just say that I am always in favor of digging a little deeper.

After all, life tastes like food, right? :)

Sesame Crusted Seared Ahi Tuna Recipe (adapted from Kevin over at Closet Cooking)

  • 1 Ahi tuna steak (mine was about 8 oz. or 1/2 pound)
  • 2 Tablespoons of black sesame seeds
  • 2 Tablespoons of white sesame seeds
  • Kosher Salt
  • Olive oil (or vegetable oil) for frying
  • Optional: (Arugula tossed in olive oil, balsamic vinegar, salt and pepper), Teriyaki sauce, soy sauce and wasabi

Let tuna steak completely defrost overnight in the freezer (if using fresh tuna, skip this step). Lightly use a paper towel and pat the steak to absorbe excess juices. Cut steak to your liking–you can sear the entire steak as it is or cut it into a rectangle to get more even slices (I did the latter and cut my tuna steak in half to get smaller pieces).

In a separate bowl big enough to fit the tuna steak, add the black and white sesame seeds as well as a sprinkle of kosher salt. Using tongs, coat the entire outside of the tuna by pressing it into the sesame seeds until the steak is completely covered.

In a pan, add enough oil to just coat the bottom of the pan and preheat the pan to medium-high heat. Then take the tuna and place it in the hot pan and sear for about 45 seconds* on all sides (including the skinnier sides!). Tongs really help for this process.

Slice steak up into pieces and serve on a bed of arugula with soy sauce and wasabi. You can also drizzle some teriyaki sauce over them for flavor if you’d like!

* I like my tuna extremely raw (like sashimi) so 45 seconds on each side was perfect. If you don’t like your tuna as raw, sear for longer but I suggest that you don’t go over 2 minutes or else your tuna will be too dry.

Life Tastes Like Food on the Women’s Health Magazine Website!

19 Jul

Happy Tuesday, Everyone!

I would just like to take a second to acknowledge a wonderful achievement for Life Tastes Like Food this week: My last recipe was featured on the Women’s Health website!

This is absolutely so exciting for me!! When I saw it, I literally did a 5 minute-long happy dance in my room. Literally. Yes, jumping up and down, arms flailing, feet shuffling—the whole shebang. I might have even thrown in a couple of these moves, too. To no music whatsoever. (I also did this same dance when I gained the majority of my wonderful readers (yes, YOU!!) from being Freshly Pressed at the beginning of this blog and this last month.)

You are all so amazing for following me through this journey of experiencing my life through food. And for that, I am extremely grateful.

So grateful, in fact, that I am going to have AN UPCOMING GIVEAWAY in your honor. Stay tuned because it will be at the beginning of August, and I am so excited for it! More details to come soon.

In the meantime, if you would like to check it out, here is the link to the small (but amazing) shout out to Life Tastes Like Food on the Women’s Health site (Yipee!):

“DYI Pizza” — http://www.womenshealthmag.com/health/news-july-18

————————————————————————————————————————–
Here are some other fun links to check out on Women’s Health as well:
10 Foods, 40 Recipes – a Print-and-Go Guide
http://www2.womenshealthmag.com/nutrition/easy-healthy-recipes
Food: A Love/Hate Story
http://www.womenshealthmag.com/nutrition/relationship-with-food
A Cleanse That Isn’t Crazy
http://www.womenshealthmag.com/nutrition/detox-diet
Gourmet Microwave Meals
http://www.womenshealthmag.com/nutrition/gourmet-meals-in-the-microwave
The Rodale Healthy Recipe Finder
http://recipes.womenshealthmag.com/homepage.aspx

Grilled Bacon, Artichoke, Arugula, and Goat Cheese Flatbread Pizza

14 Jul

Wow, that’s a long title–and those aren’t even all the toppings! But for the sake of length, I had to simplify. Here’s the actual pizza title that just wouldn’t seem to fit in the title box:

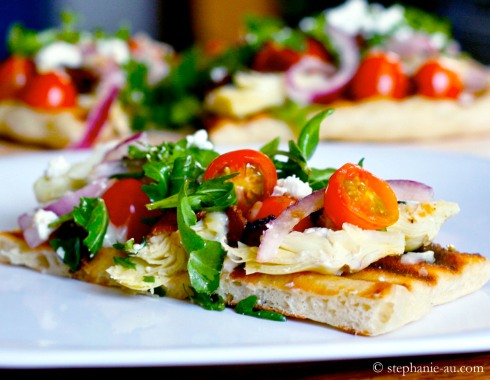
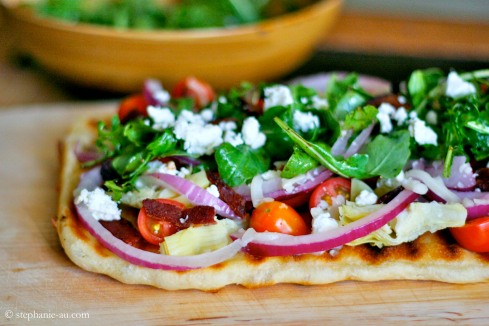
Grilled bacon, artichoke, arugula with dressing, grape tomatoes, red onion, mozzarella, and goat cheese flatbread pizza. 

Yes. 
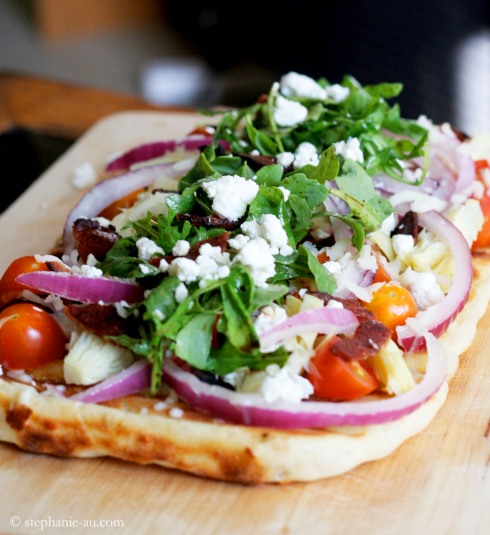
When I was living in the dorms and even during the year after I moved out, ordering in pizza was a staple for me. “Ordering in” as in I would order an entire pizza, just for myself. Sure, I’d share with whoever was around, but I never thought twice about it even if I knew I’d be the only one to eat it all. I would eat multiple pieces for dinner (preferable sitting on the ground and straight out of the box), then eat it cold the next morning for breakfast and then have a couple more pieces for lunch. Yes, that sounds so ridiculous, and very unhealthy…but it was so satisfying. There’s just something soothing about pizza…

Nowadays, I’ll go out to pizza with my friends but I don’t remember the last time I’ve ordered a pizza all to myself! Maybe that’s a good thing. I have, however, adapted to making my own pizza at home. I feel like this doesn’t make me regress back to my earlier eat-a-whole-pizza-in-less-than-24-hours phase though because the pizzas I make at home tend to be half the size and healthier (well, maybe only sometimes).

Since it’s summer though and scorching hot, most foods just seem too heavy right now. But I want pizza! Resolution: grilled “flatbread” pizza. Ok, it’s kind of cheating when I call it flatbread but to me, it totally works. And it’s so simple! Fresh, light, creamy, and enjoyable anytime of the day.

I bought a pre-made package of pizza dough, some fresh veggies, bacon, cheese, and fired up my grill pan. In about 30 minutes, I was chomping on some delicious grilled flatbread pizza! I wanted it to be extra light so I didn’t use any pizza sauce, although I’m sure it would have tasted very good with pizza sauce (oh, or better yet with some pesto!). I did, however, toss the arugula in some olive oil and balsamic vinegar which was a great addition.

Grilled Flatbread Pizza (makes 2 individual sized flatbread pizzas*)

  • 1 16 oz. Package of pre-made pizza dough (I got mine from Trader Joe’s for only $1.29!)
  • Handful of grape tomatoes, cut in half
  • Artichoke hearts, quartered
  • 1/2 Red onion, sliced thinly
  • 6 Strips of Applewood smoked bacon, fried extra crispy and crumbled
  • 1 Cup of arugula
  • 1/2 Cup of mozzarella
  • Crumbled goat cheese
  • 1 1/2 Teaspoon of olive oil + extra for grilling
  • 1  1/2Teaspoon of Balsamic vinaigrette
  • Salt and pepper
Follow directions accordingly to prepare the dough (for my dough, I had to let it sit out for 20 minutes). Pre-cook and crumble the bacon, cut the tomatoes, artichoke hearts, and onion. In a separate bowl, toss the arugula with 1 1/2 teaspoon of olive oil and 1 1/2 teaspoon of balsamic vinaigrette so that the arugula is lightly coated. Sprinkle in some salt and pepper to taste.

[For these next steps, only add half of the toppings, as you will repeat the same process for the second pizza (since you are making two “servings”–or make both pizzas at once if there’s enough room on the grill!]

Heat the grill or grill pan to medium-high heat so that it’s nice and hot. Cut the dough in half (so there is about 8 oz. of dough for each pizza) and stretch the dough until it’s about 1/2 an inch thick. Lightly  drizzle olive oil over one side of the dough and spread evenly with a pastry brush so that it lightly coats the top of the dough. Place the dough on the grill pan olive oil side down. Let it cook for about 5 minutes or until the bottom is getting nice grill marks.

While the first side is cooking, drizzle olive oil on the second side and brush the entire surface of dough with the olive oil evenly. After the bottom has dark grill marks, flip the dough over. Add the tomatoes, artichoke hearts, onion, and bacon. Top with the mozzarella cheese and a little bit of goat cheese. Let cook for about 4 minutes. Close grill lid or cover grill pan for about 1 minute–just long enough for the cheese to melt slightly. Remove from grill, top with arugula and more goat cheese.

Repeat all steps for second individual sized pizza.

*When I say individual servings, I mean BIG individual servings.
**4-5 minutes on each side should be enough because the dough should be thin enough to cook through that quickly, but double check and make sure the middle of the dough is cooked before serving. If not, just leave it on the grill for a couple more minutes.
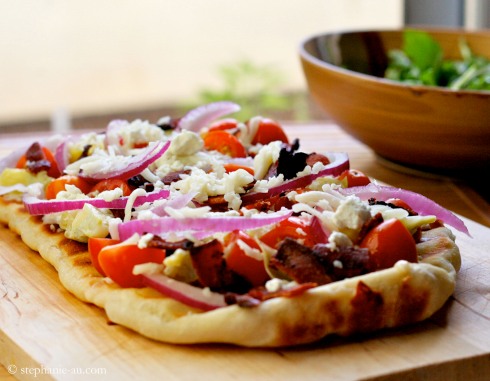
Pizza right off the grill--before arugula and extra goat cheese was added.
Chocolate Merlot Cupcakes

11 Jul

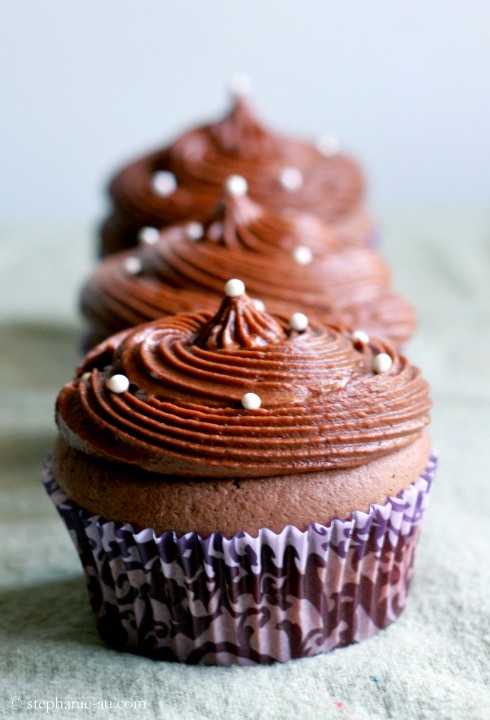
Oh, yes, you read correctly. Chocolate. Merlot. Cupcakes. WITH Chocolate. Merlot. Frosting.

Last week was my wonderful roommate’s birthday, and to celebrate I wanted to make something fun. We both love chocolate, and we both enjoy wine. And cupcakes? Well, there’s just no substitute! So I figured that this was the perfect dessert to make for her! And I really like the touch the decorative cupcake liners add to the cupcakes, don’t you?

Birthdays are so enjoyable to me because I am thoroughly fond of making food that has a special meaning. Holidays, for example, are really fun, and with birthdays, personalizing a cake or making something that you know the birthday person loves is so exciting and unique! If you like Merlot and chocolate, I think you will enjoy these as well!

According to the original recipe, these cupcakes were suppose to be a lot darker so don’t know what happened, but they still tasted amazing. And with a hint of spice from the nutmeg and cinnamon, these cupcakes were definitely one of a kind. Also, the cupcakes are nice and boozy (which we liked) but if you don’t care for a stronger wine flavor, I suggest you either make plain chocolate cupcakes with the Merlot frosting or the Merlot cupcakes with plain chocolate frosting. If anyone attempts to make them, please let me know how they turned out!

I hope everyone had a wonderful weekend!

Chocolate Merlot Cupcakes Recipe (via Yuri from Chef Pandita)

  • 3/4 Cup unsalted butter
  • 1 1/2 Cups sugar
  • 4 Eggs
  • 1 Cup Merlot
  • 2 1/2 Cup all-purpose flour
  • 1 1/2 Teaspoons baking powder
  • 1/2 Teaspoon ground cinnamon
  • 1/4 Teaspoon ground nutmeg
  • 6 Ounces dark chocolate, melted

Preheat oven to 350F degrees. Line two 12-cup cupcake pans with cupcake baking cups*. Cream the butter and sugar together, then mix in the eggs one at a time until everything is incorporated. Then add the Merlot. In a separate bowl, mix the rest of the dry ingredients together and then slowly add to the butter mixture. Mix in the melted chocolate. Pour batter into the cups, filling them about 3/4 of the way full.

Bake for 20-25 minutes.

*I actually only had enough batter to make 21 cupcakes instead of the 24.

Chocolate Merlot Frosting** (via Moms Who Need Wine)

  • 2 3/4 Cups confectioners sugar
  • 6 Tablespoons unsweetened cocoa powder
  • 6 Tablespoons butter
  • 5 Tablespoons Merlot wine
  • Optional: White cupcake pearls

Cream butter and slowly add the confectioners sugar. Then add the cocoa powder alternating one tablespoon at a time with the Merlot. Incorporate until the mixture is nice and fluffy. Make sure cupcakes are completely cooled, and then using a frosting tip and piping bag, pipe frosting onto the cupcakes. Then apply the white pearls directly on the frosting as decoration.

**I made 1.5x this recipe in order to have enough frosting for all the cupcakes, but it all depends on how much frosting you want on each individual cupcake!

Buffalo Fries

5 Jul

I love buffalo wings. Almost as much as I love bacon. I seriously went through a phase where I would just crave buffalo wings and want them for every single meal! But then again, I go through specific food phases a lot–like with sushi. And spinach. For some reason, though, buffalo wings will always have a special place in my heart.

I’m not sure if it’s the tanginess from the vinegar, the crunch of the crispy outside, or the spicy kick from the sauce, but buffalo wings always leave me feeling completely satisfied. I also always do a little happy dance when I see them on a menu when eating out (don’t laugh)!

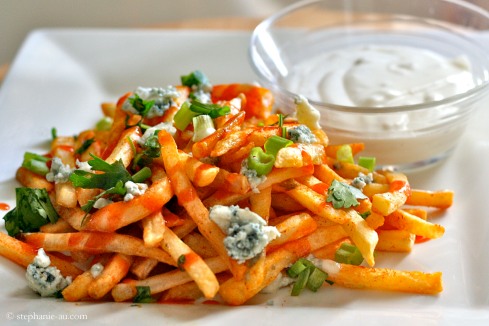
So, to get my fix without having to go through the tedious process of prepping and deep-frying chicken wings, my substitute is a large batch of buffalo fries! It’s a great snack and definitely satisfies that ridiculous buffalo wing craving of mine. This recipe rocks, but you have to eat it right away or else the fries tend to get soggy!

Are buffalo wings one of the best food ideas ever invented or what?! Or am I the only one that thinks that? :)

Here is the recipe:

Buffalo Fries Recipe

  • 1/2 bag of frozen shoe string french fries
  • 1 teaspoon cayenne powder
  • 1/2 teaspoon cajun seasoning
  • 1 tablespoon of buffalo wing sauce plus extra for drizzling (I used a bottle of Frank’s RedHot Wing Sauce: Buffalo)
  • Crumbled blue cheese
  • Ranch dressing
  • Garnish: green onion and cilantro, finely diced

Bake fries in a single layer on a baking sheet according to the package. When the fries are nice and crispy, put them in a bowl and toss with the cayenne powder and cajun seasoning (you can add more cayenne here if you want a the fries to be spicier).

Drizzle 1 tablespoon of buffalo hot sauce over the fries and toss again so that they are lightly coated (don’t go too heavy here!). Arrange the fries on a plate and drizzle more buffalo sauce across the entire dish. Top with some crumbled blue cheese, green onion, and cilantro.

Serve with a side of ranch dressing, and enjoy!

Tip: Sometimes I’ll put half of the blue cheese on the fries after I toss them in the cayenne and cajun seasoning and pop them back in the oven for a couple minutes until the cheese is melted. Then I add the rest of the cheese and hot sauce once the fries are plated. This is a great way to switch the dish up a little from time to time!

Vietnam: Phở Real

2 Jul
The following post is written by my dear friend, Ryan, over at Boundless Abundance. He is writing to us all the way from Vietnam! Ryan’s adventures in food, scenery, history, and an overall perspective of each culture he encounters is something that should not be overlooked, and it’s wonderful that he has taken the time to give us a little taste of the Vietnam region. His blog is inspiring, beautiful, and brings out the wanderlust in all. To read more about his adventures, click here!
—————————————————————————————————-

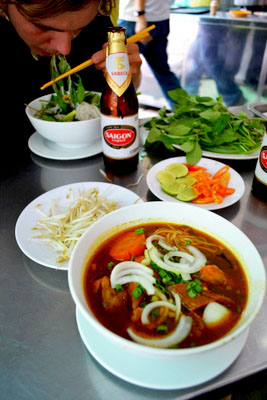
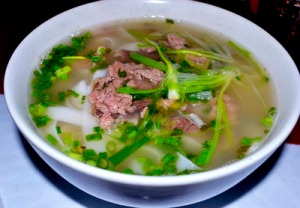
Eaten for breakfast, lunch and dinner, phở is a staple in Vietnamese cuisine if not its most popular dish. At its heart the soup is composed of a hefty portion of rice noodles submersed in a large bowl stock and it’s the additions to this base that are the source of variety—meat and organs of beef, chicken, pork, shrimp and fish cakes seemed to be the most popular though I’ve also come across duck, goat, dog and horse as well as some mysterious animal byproducts of unknown origin. 

Pots used to cook this dish

On the hunt for good phở a Lonely Planet Guide is little help, its suggestions are usually more expensive and less authentic so don’t bother, just wander the side streets and eat where the locals are, it’s unlikely you’ll have to go far. Many hole-in-the-wall restaurants and transient street carts that appear on the sidewalks at sunset specialize in the dish and serve nothing else. For a visual gauge of cost, generally speaking, the shorter the plastic stools and tables the cheaper the phở (a rule that conveniently holds for beer also), and if the crowds aren’t an obvious indication of quality seek a venue with plenty of trash below its tables—no joke, the dirtier the better. In Vietnamese restaurants napkins, cigarette butts, toothpicks, wrappers and any other garbage generated at the table is thrown on the ground and swept out at the end of the day, so a dirty floor is the sign of high patronage and good food turnover.

Menus at most phở spots are simple and easy to decipher even with a limited grasp of Vietnamese, but the meats offered are usually on display so if all else fails you can window shop and point to attain the desired results. Since everything is cooked ahead of time there is little wait after ordering before a bowl is placed before you along with a stacked plate of trimmings. Mint, basil, lotus shavings, Asian spinach, lettuce, bean sprouts, limes and diced chilies or chili paste are common accompaniments allowing diners to develop the taste to their liking. I personally go heavy on the greens and bean sprouts for crunch, add chilies to just below an eye-water and squeeze in half a lime to balance the burn and round out the flavor.

When you mix spicy chilies, a bowl of hot liquid and Vietnam’s humid climate the outcome is always the same: a serious phở sweat! It’s a strange state of content discomfort that is oh so gratifying. A bit time after finishing the meal is always allotted to linger and let the momentary meltdown to subside, a local beer or the ubiquitous iced Vietnamese tea helps. It’s an opportunity to savor the flavor and take pause to absorb the scene—I’m in Vietnam!

—————————————————————————————————-

 Ryan’s blog, Boundless Abundance, is a casual chronicle of his year-long adventure abroad. After recently finishing university he feels extremely fortunate to have this opportunity to pursue a different sort of education than academia provides. Exposure to contrasting worldviews, cultures and contexts yields new vantages for a fuller awareness of Self and how he perceives of the world, as well as a richer understanding of the state of the planet and what it means to be a human alive today.

[A note from Stephanie: If you want to give homemade pho a try, click here for the recipe (via Allrecipes). If you want to skip making the broth, this canned broth works well, and it can be found at local Asian markets. If using canned broth, you can skip steps 1 and 2 in the recipe. Enjoy!]